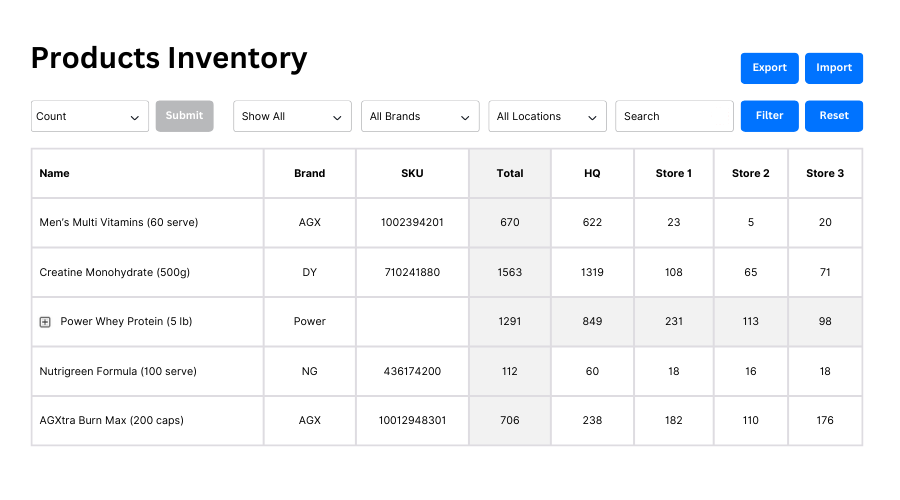
The products inventory page gives a concise overview of inventory levels across all locations in an ‘excel’ style format for easy and quick actions.
You can use the following settings / filters to view the inventory data:
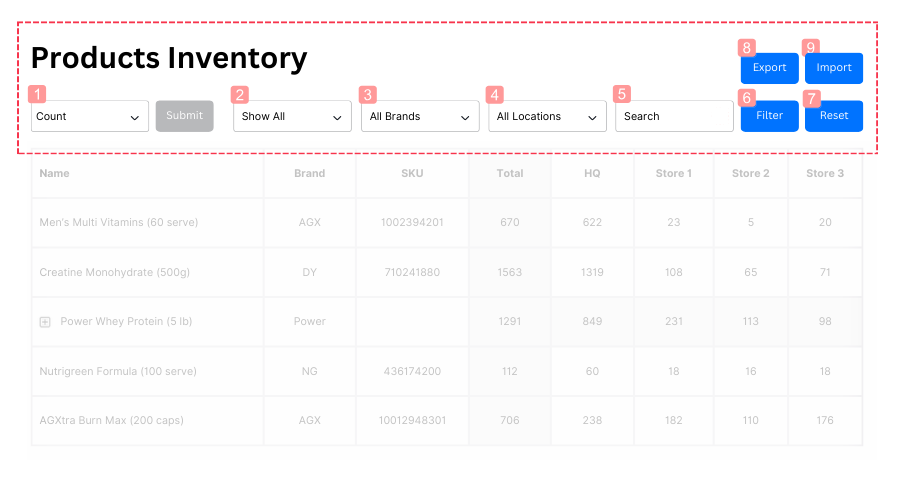
1 – Inventory Action
This is most important dropdown menu on this page, as it controls the inventory action that the user will perform. There are a total of 4 inventory actions: Count, Production, Missing, Damage
CountShows data table of all current inventory across all locations, and it's total quantity for each product.
ProductionShows data table ready for manual input of quantity that is used in production (to deduct off).
MissingShows data table ready for manual input of missing quantity of products / components (to write off).
DamageShows data table ready for manual input of damaged products / components quantity (to write off).
2 – Filter (Stock Status)
Default view shows all products in the entire database. Choose options to view only products that are in stock or out of stock.
3 – Filter (Brands)
Default view shows all brands. Multi-selectable filter to view only the brands that you want to.
4 – Filter (Locations)
Default view shows all locations. Multi-selectable filter to view only the locations you wish.
5 – Search Bar
Enter product name keywords to search for products.
6 – Filter Action Button
Clicking on this button executes the filtering of the data table based on filters 2, 3, 4 and 5.
7 – Reset Filters Button
Clicking on this buttons resets filters 2, 3, 4, and 5 to default view.
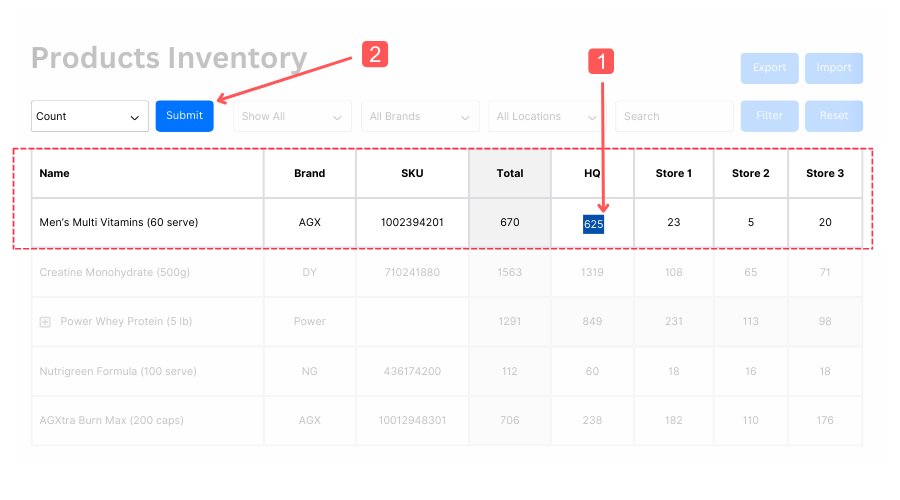
Edit Total Quantity with ‘Count’
The ‘Count’ feature allows for stock adjustment. Any difference in stock level will be reflected as an adjustment action in the log files. To adjust the inventory level:
1. find the corresponding product and location, and click on its inventory quantity’s cell, and edit. Enter the new total quantity. If initial total